
Process expenses
Once expenses have been created and submitted, they must be processed by an authorized database user. In Odoo, most users cannot process expenses; only users with the necessary access rights or permissions can. This means that a user must have at least Team Approver rights for the Expenses app. Employees with the necessary rights can review expenses, approve or refuse them, and provide feedback with an integrated refuse expense communication tool.
View expenses
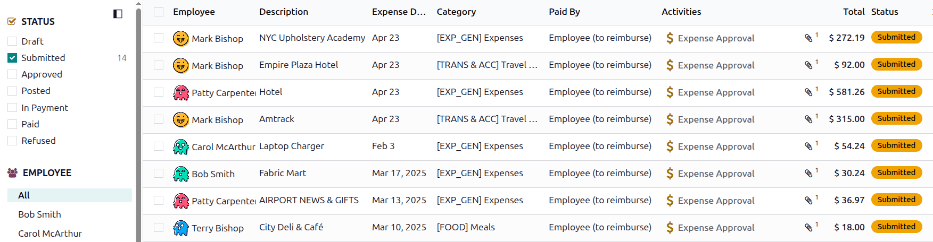
Users who are able to process expenses (typically managers) can view all expenses they have access rights for in the Expenses to Process dashboard. To view the dashboard, navigate to .
A list of all expenses with a status of Submit appears, while expenses with a status of Draft, Approved, Posted, In Payment, Paid, or Refused are hidden by default. To view expenses with a different status, click the corresponding Status button in the side panel.
Approve expenses
Expenses can be approved in two ways: individually or in bulk.
Important
Only reports with a status of Submitted can be approved.
Approve individual expenses
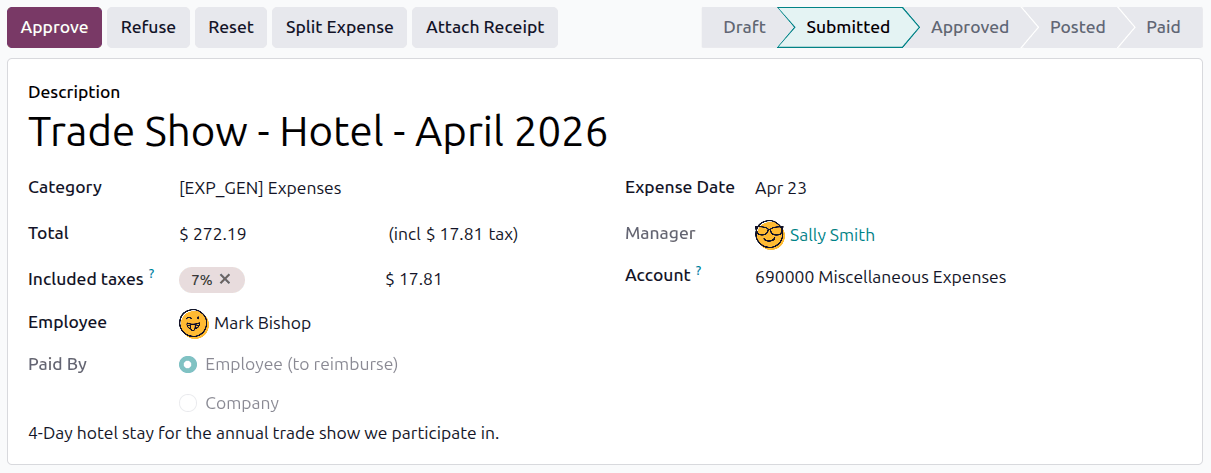
To approve an individual expense, navigate to , and click on an individual expense to view the details.
From here, several options are presented: Post Journal Entries, Report in Next Payslip Approve, Refuse, Reset, Split Expense, and Attach Receipt. Click Approve to approve the expense.
Approve multiple expenses
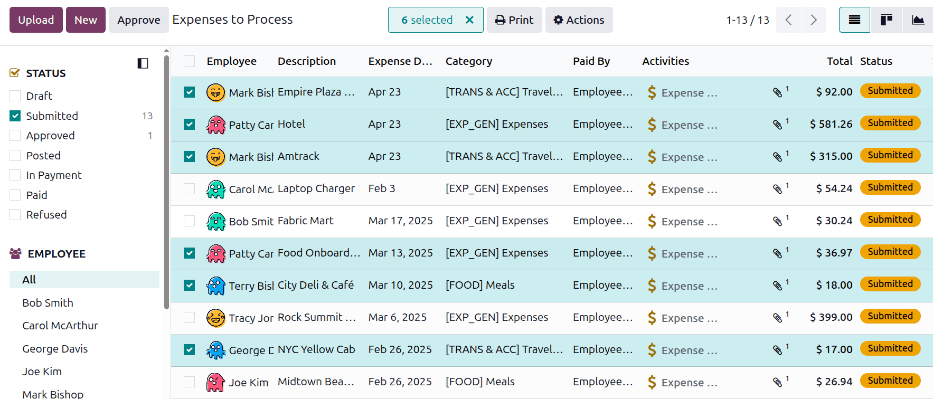
To approve multiple expenses at once, first navigate to to view a list of all expenses waiting to be processed. Next, select the expenses to approve by ticking the checkbox next to each expense being approved, or tick the checkbox next to the Employee column title to select all the expenses in the list.
Next, click the Approve button.
Tip
Team managers can view all the expenses for their team members only. While on the Expenses to Process page, click the (down arrow) on the right-side of the search bar, then click My Team in the Filters section. This presents all the expenses for only the manager’s team.
Refuse expenses
Expenses can only be refused individually, and not from the Expenses to Process dashboard. To refuse an individual expense, navigate to , then click on an individual expense to open the detailed expense record.
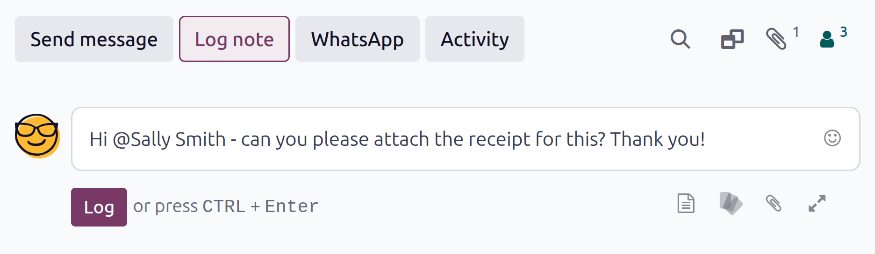
If more information is needed, such as a missing receipt, communicate any necessary information requests in the chatter of the expense record. On the individual expense, click either Send message or Log note to open a message text box.
Type in a message, tagging the proper people, and post it to the chatter by clicking Send or Log, depending on the method of communication. The message is posted in the chatter, and the tagged people are notified via email.
Note
The only people that can be tagged in a message are followers of the specific expense. To see who is a follower, click the (Show Followers) icon to display the followers of the expense report. Additional followers can be added by clicking the (Show Followers) icon, then clicking Add Followers.
To refuse an expense, click Refuse, and a Refuse Expense pop-up window loads. Enter a brief explanation for the refusal in the Reason field, then click Refuse.
Important
A reason must be entered in the Reason field, or the expense cannot be refused.
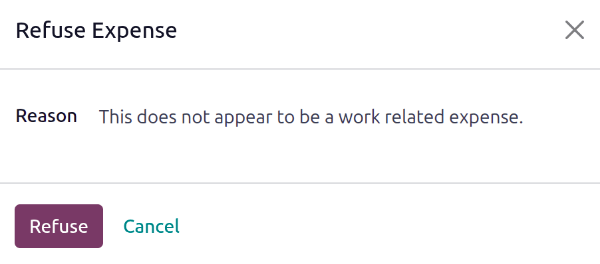
Once the expense is refused, the status changes to Refused, and the only buttons that appear are Add Receipt and Reset.